Manage Attachments
You can access the management page by navigating to Catalog -> Attributes -> Attachments. Once you reach the management page, you can add, edit, and delete your attachments, as well as import and export them.

To add a new attachment, click on the 'Add' button located in the top right corner of the page, which will take you to the following page.
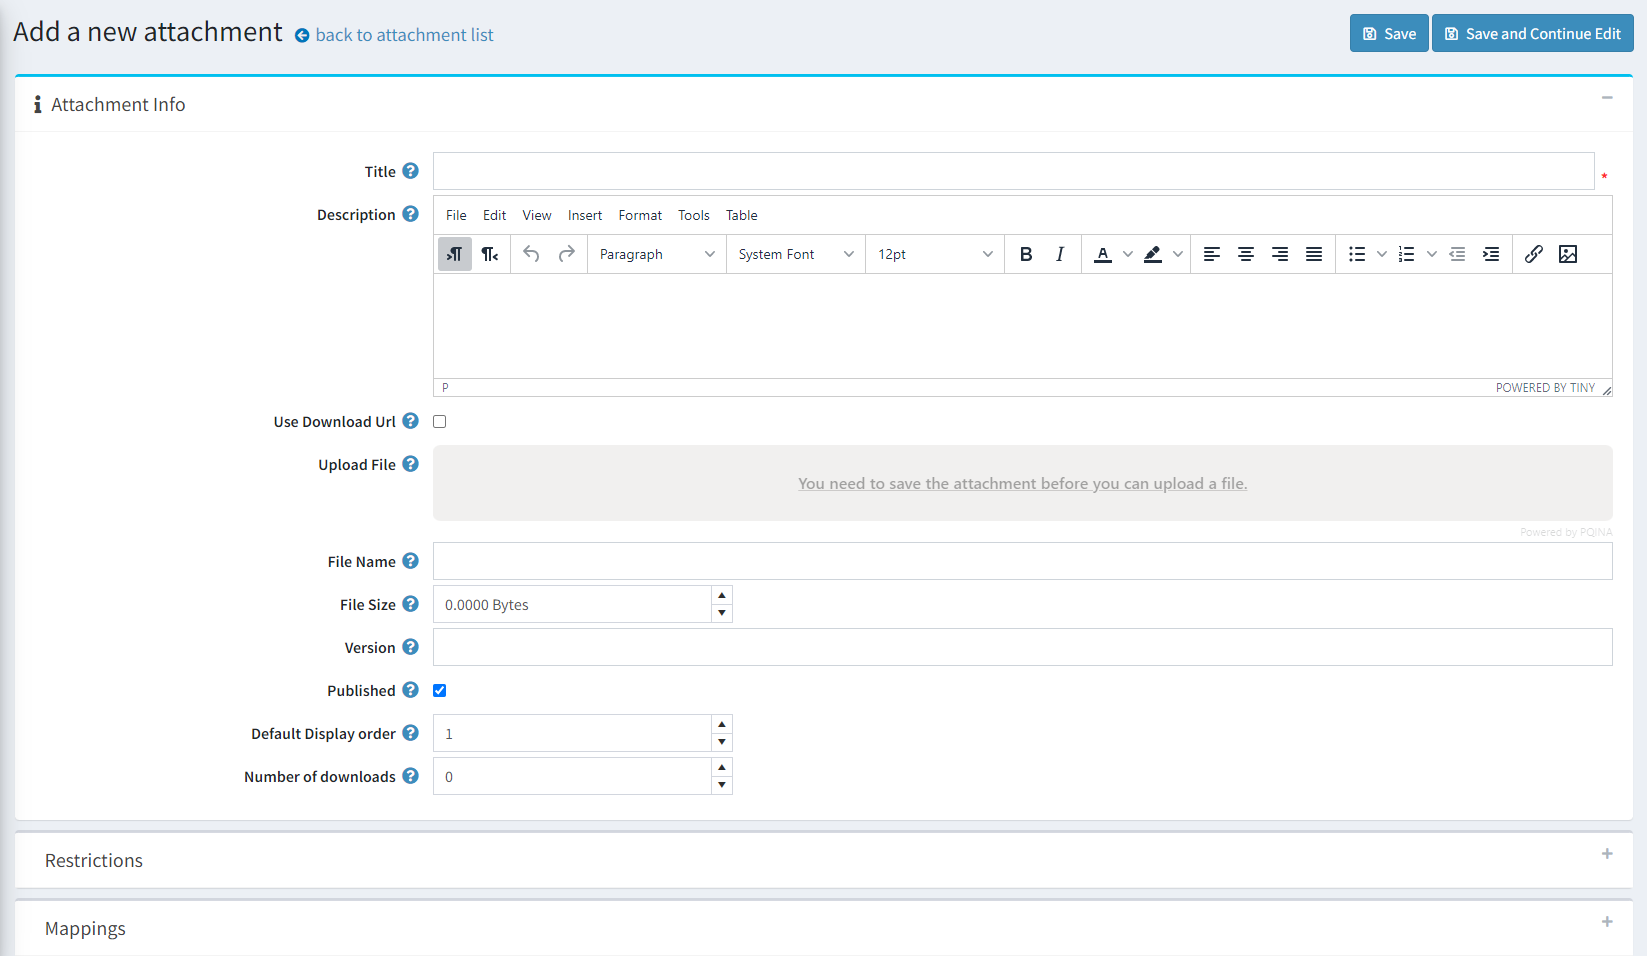
Attachment Info
The 'Info' section allows you to specify general information about the attachment.
- Title: The title of the attachment refers to the name that will be displayed to the client when they view or download the attachment.
- Description: The description field allows you to provide additional information about the attachment in HTML format. This can include details such as the purpose of the attachment, instructions for use, or any relevant legal disclaimers.
- Use Download Url: If you prefer to provide a file URL instead of uploading the file, simply check the corresponding option. This will reveal an additional field where you can enter the URL.
- Url: The url to the file
- Upload File: Here, you can either browse for your attachment file or use drag-and-drop to upload it. Note that you must save the attachment before uploading the file.
- File Name: The 'File Name' field specifies the name that will be displayed to the user. If left unchanged, it will default to the name of the uploaded file.
- File Size: File size is calculated when you upload a file or provide a url to the file.
- Version: The 'Version' field allows you to keep track of changes made to the attachment by specifying a version number.
- Published: By setting this field to 'True', you allow users to view and download the attachment. If set to 'False', the attachment will not be visible or downloadable to users.
- Default Display Order: The 'Display Order' field is a default value that determines the attachment's order when attached to an item. It can be configured differently for each item.
- Number of Downloads: The Number of Downloads or'Download Count' field indicates the number of times that the attachment has been downloaded by users.
Restrictions
You can set restrictions on who is able to view the attachments here.
- Start date: Start date refers to the time when the attachment will become available to view.
- End date: End date refers to the time when the attachment will become unavailable to view.
- Limited to customer roles: You can specify the roles that can view this attachment.
- Limited to stores: You can limit the attachment to specific stores.
Mappings
In this section, you can select the store items to which you want to attach your file. In addition to this tab you have an attachment tab in each of these items pages that you can specify the mapping there too. Currently, you can attach your file to products, categories, manufacturers, blog posts, and news items.
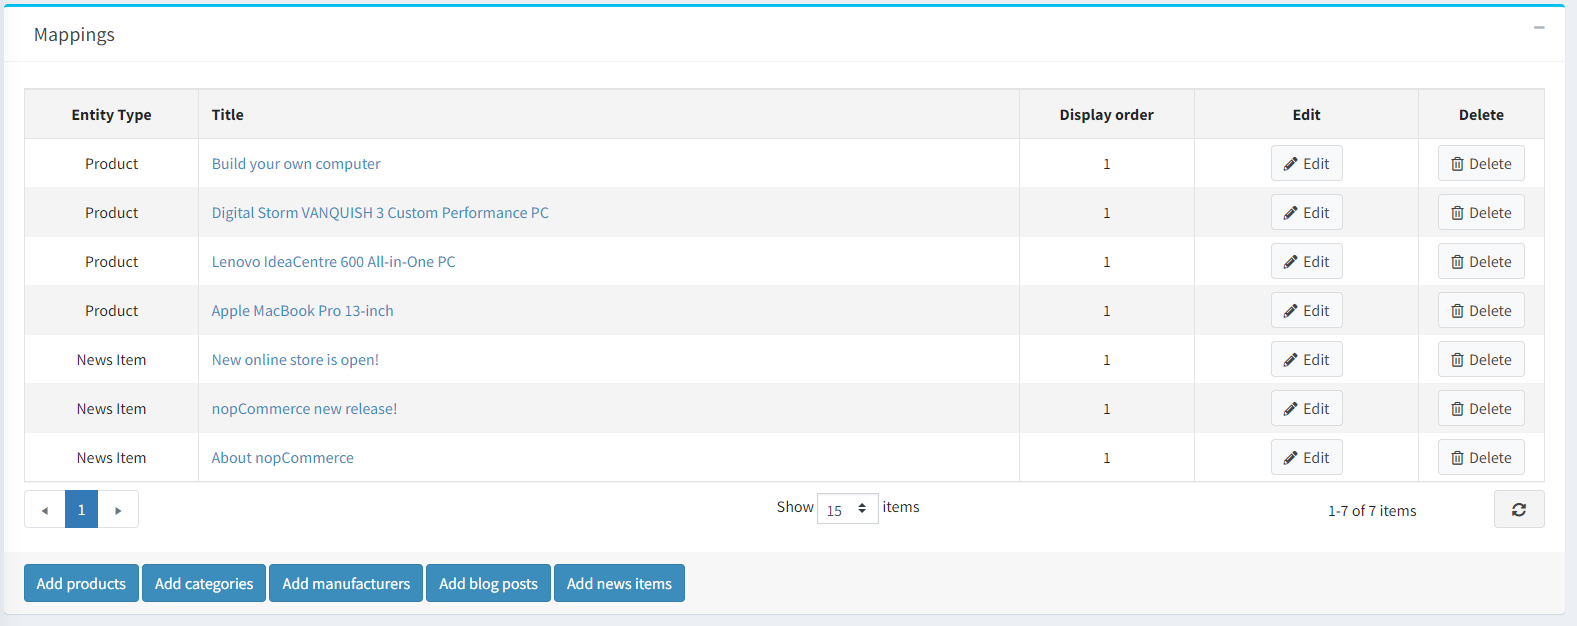 By clicking on each of the 'Add Item' buttons, a list of items will be displayed, and you can select the ones you want to attach the file to.